Quick start guide
Introduction
This guide is for anyone getting started setting up a service project in Jira Service Management. If you haven’t done so already, sign up for Jira Service Management for free. Once you’re in Jira Service Management, you can get everything set up by following the prompts. If you need additional help, or just want to see everything in one place before diving in, this guide is for you.
Note that this guide is specifically for Jira Service Management project administrators. If you are a Jira Service Management agent, check out our Agent Onboarding Guide instead.
Step 1 - Set up and customize your project
Create your service project
Jira Service Management has a variety of project templates to help teams get set up quickly by creating projects tailored to a specific team or use. These templates include pre-configured request types, workflows, and other relevant features. Available templates include IT service management, general service, customer service, HR, facilities, and legal service management.
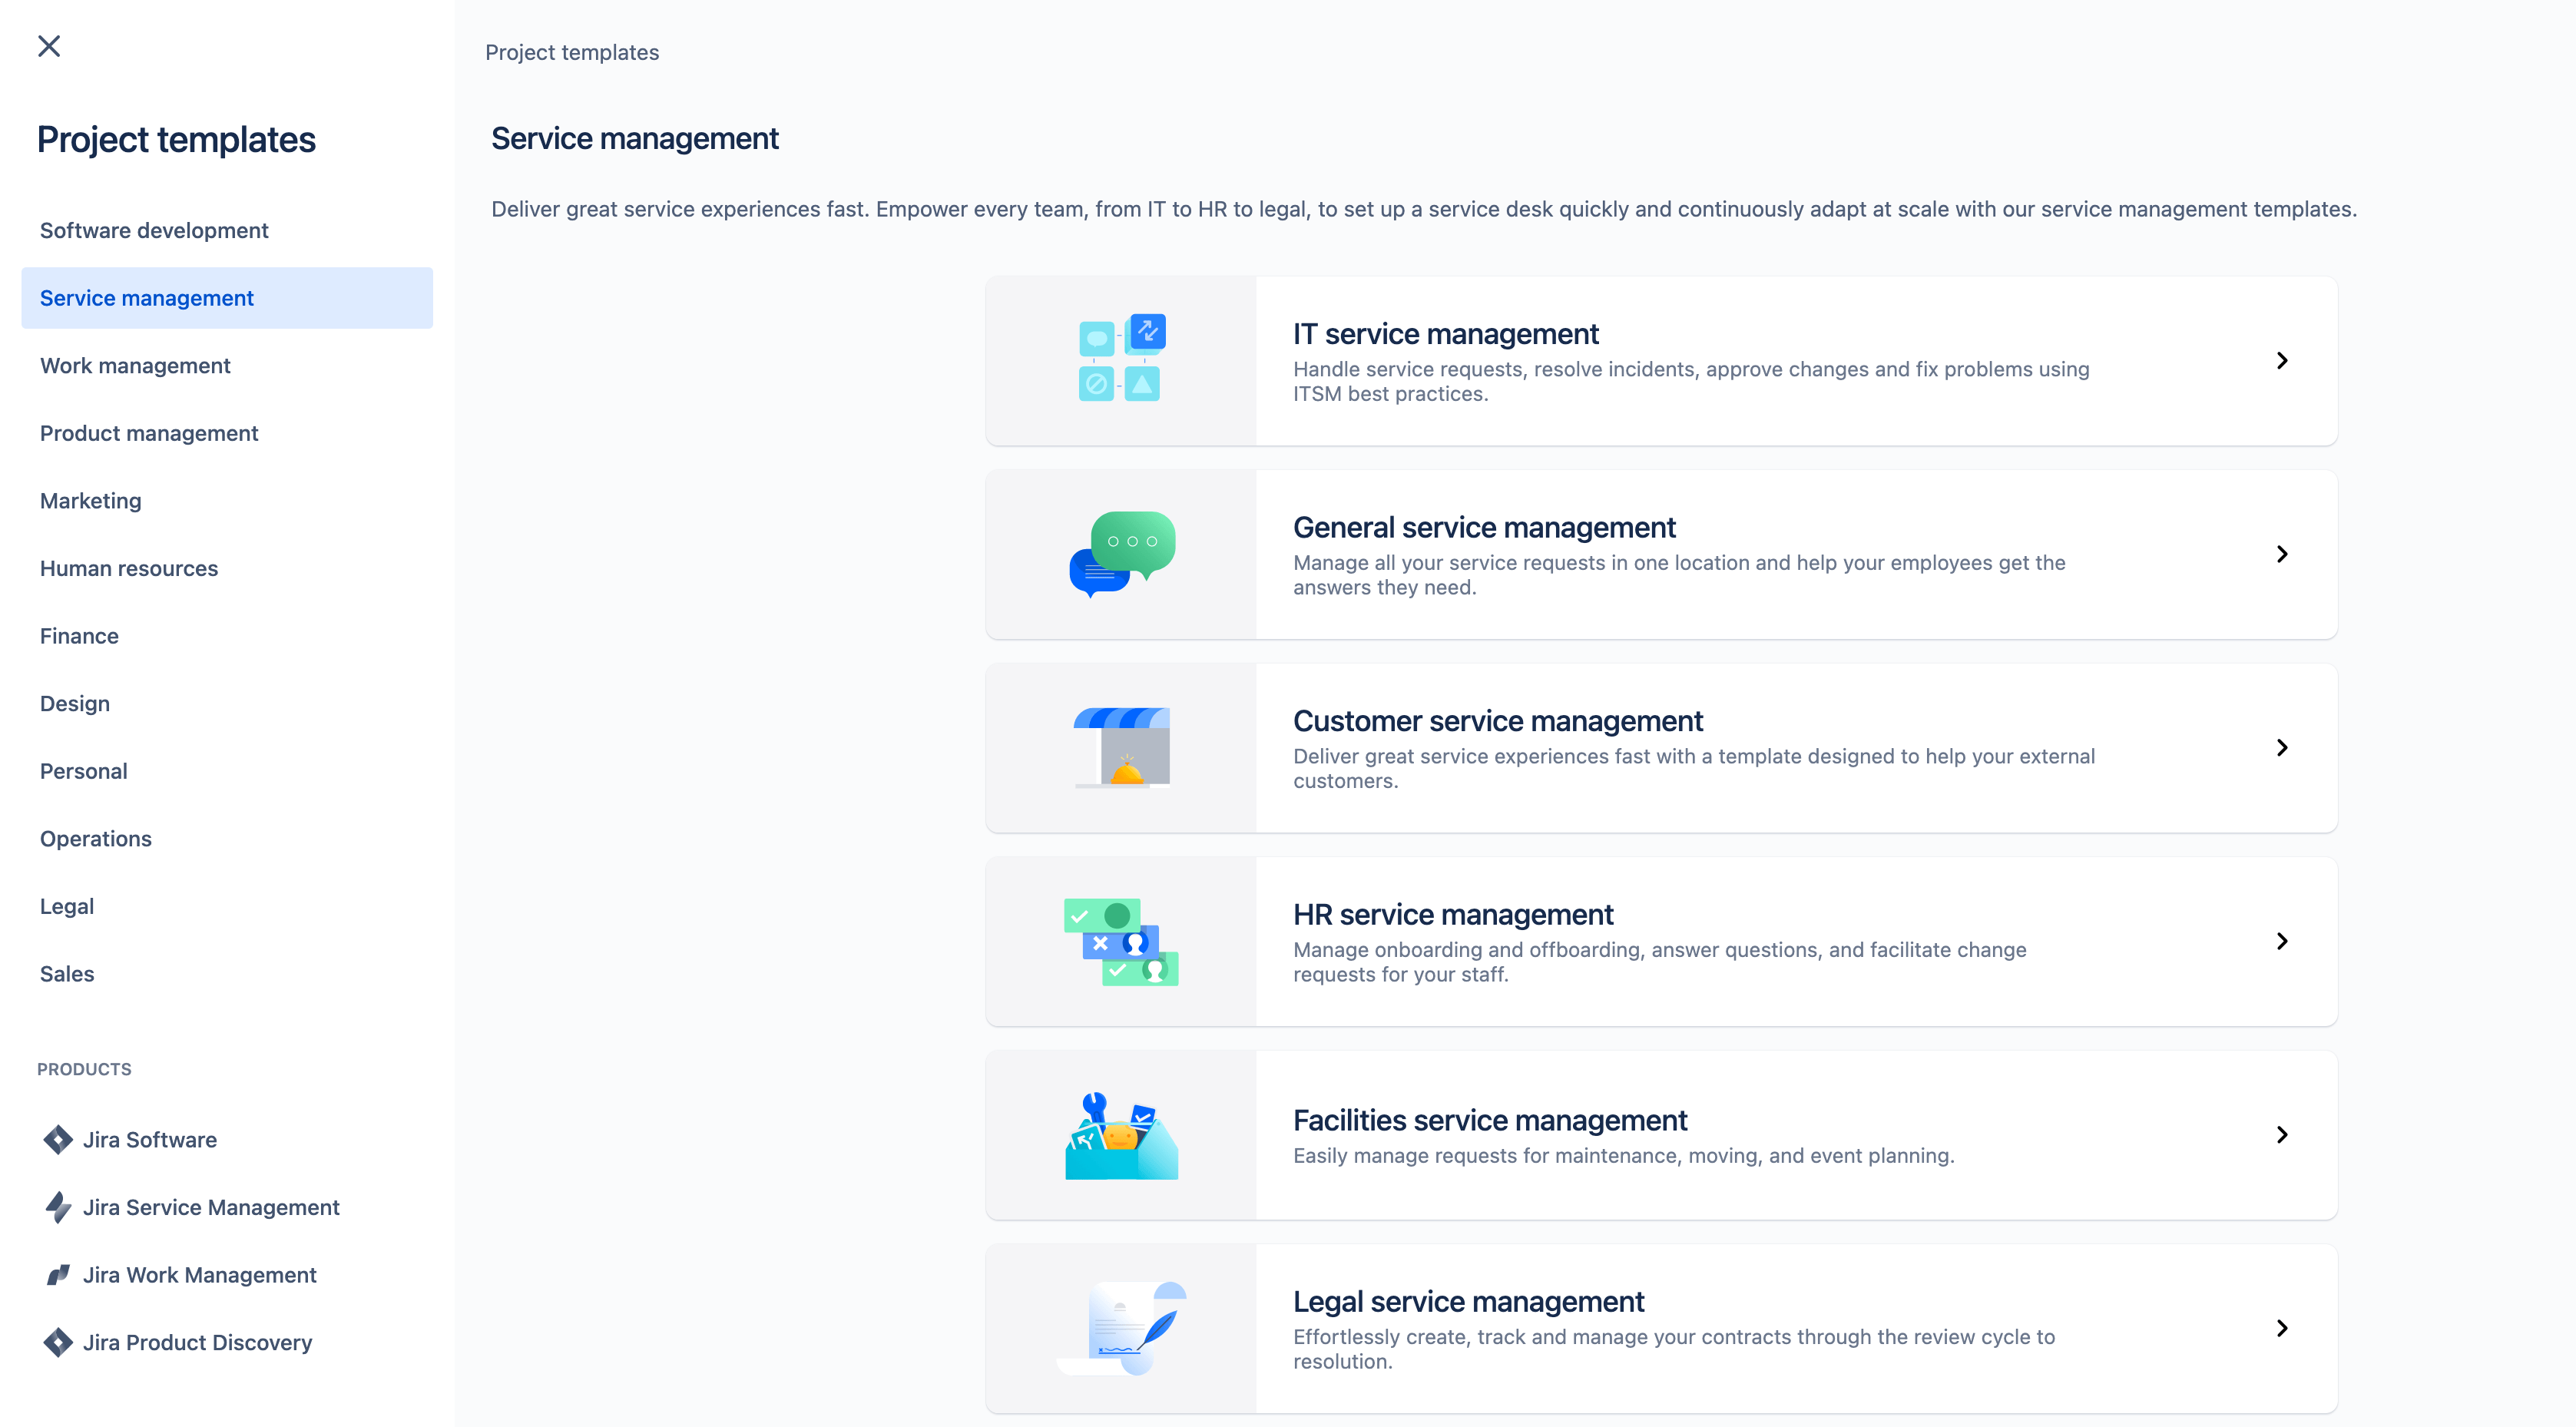
To create a service project:
- Select Projects in the top menu bar > Create project.
- Choose a template from the available service management project templates.
- Select Use template.
- Select either a team-managed or company-managed project type. (Note: team-managed project types are only available for certain project templates.)
- Name your project.
- Create a project key or use the generated key.
- Choose if you would want to share settings with an existing project. If yes, specify the name of the existing project.
- Select Create project.
Customize your help center and portal
Customers go to your help center and portal(s) to request help. Customization is important to ensure that you provide a consistent brand experience in which your customers see all the relevant information.
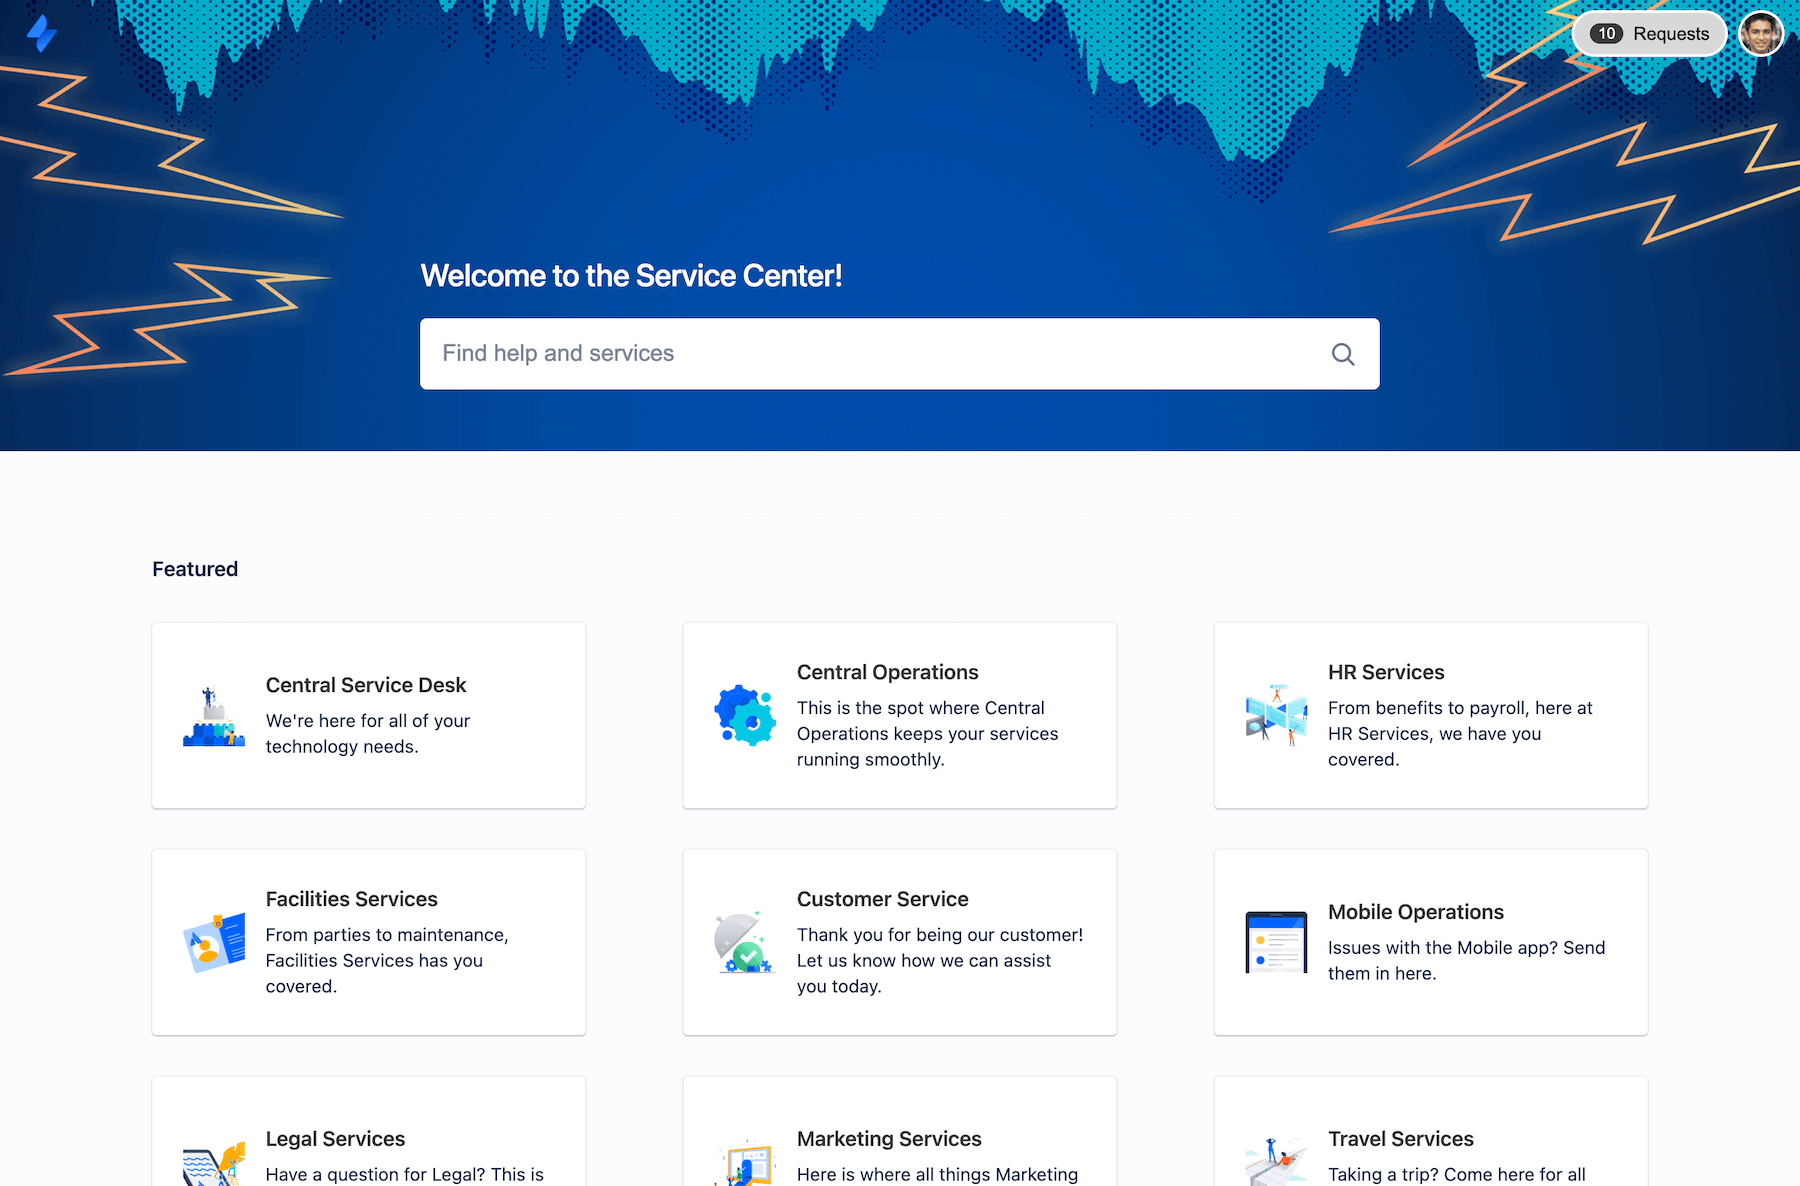
Customize your help center
Let’s start with the help center. Your service project comes with an online help center for your customers. From the help center, customers can browse all the service project portals they have access to, submit requests, and search your embedded knowledge base to help themselves. Below is an overview of the key settings you can customize in the help center:
Login message
Add a message on your login page to welcome your customers or guide them through the login process.
Announcements
Announcements on your help center’s home page keep your customers updated on important news or service-related issues.
Look and feel
Customize the look and feel of your help center portal, including:
- Help center name
- Home page title
- Logo
- Banner
- Banner background, link, and button color
- Help center banner text color
Home page layout
Customize how your service projects are displayed in your help center. Organize and feature your service projects to make sure that your customers can find what they’re looking for. You can also sort your remaining service projects by popularity or name.
To change any of the items above:
- Go to Settings > Products.
- Select Configuration under Jira Service Management in the sidebar menu.
- Under Customize your help center, you’ll see a list of customization options available to you.
- Choose the relevant option, make changes, and select Save changes.
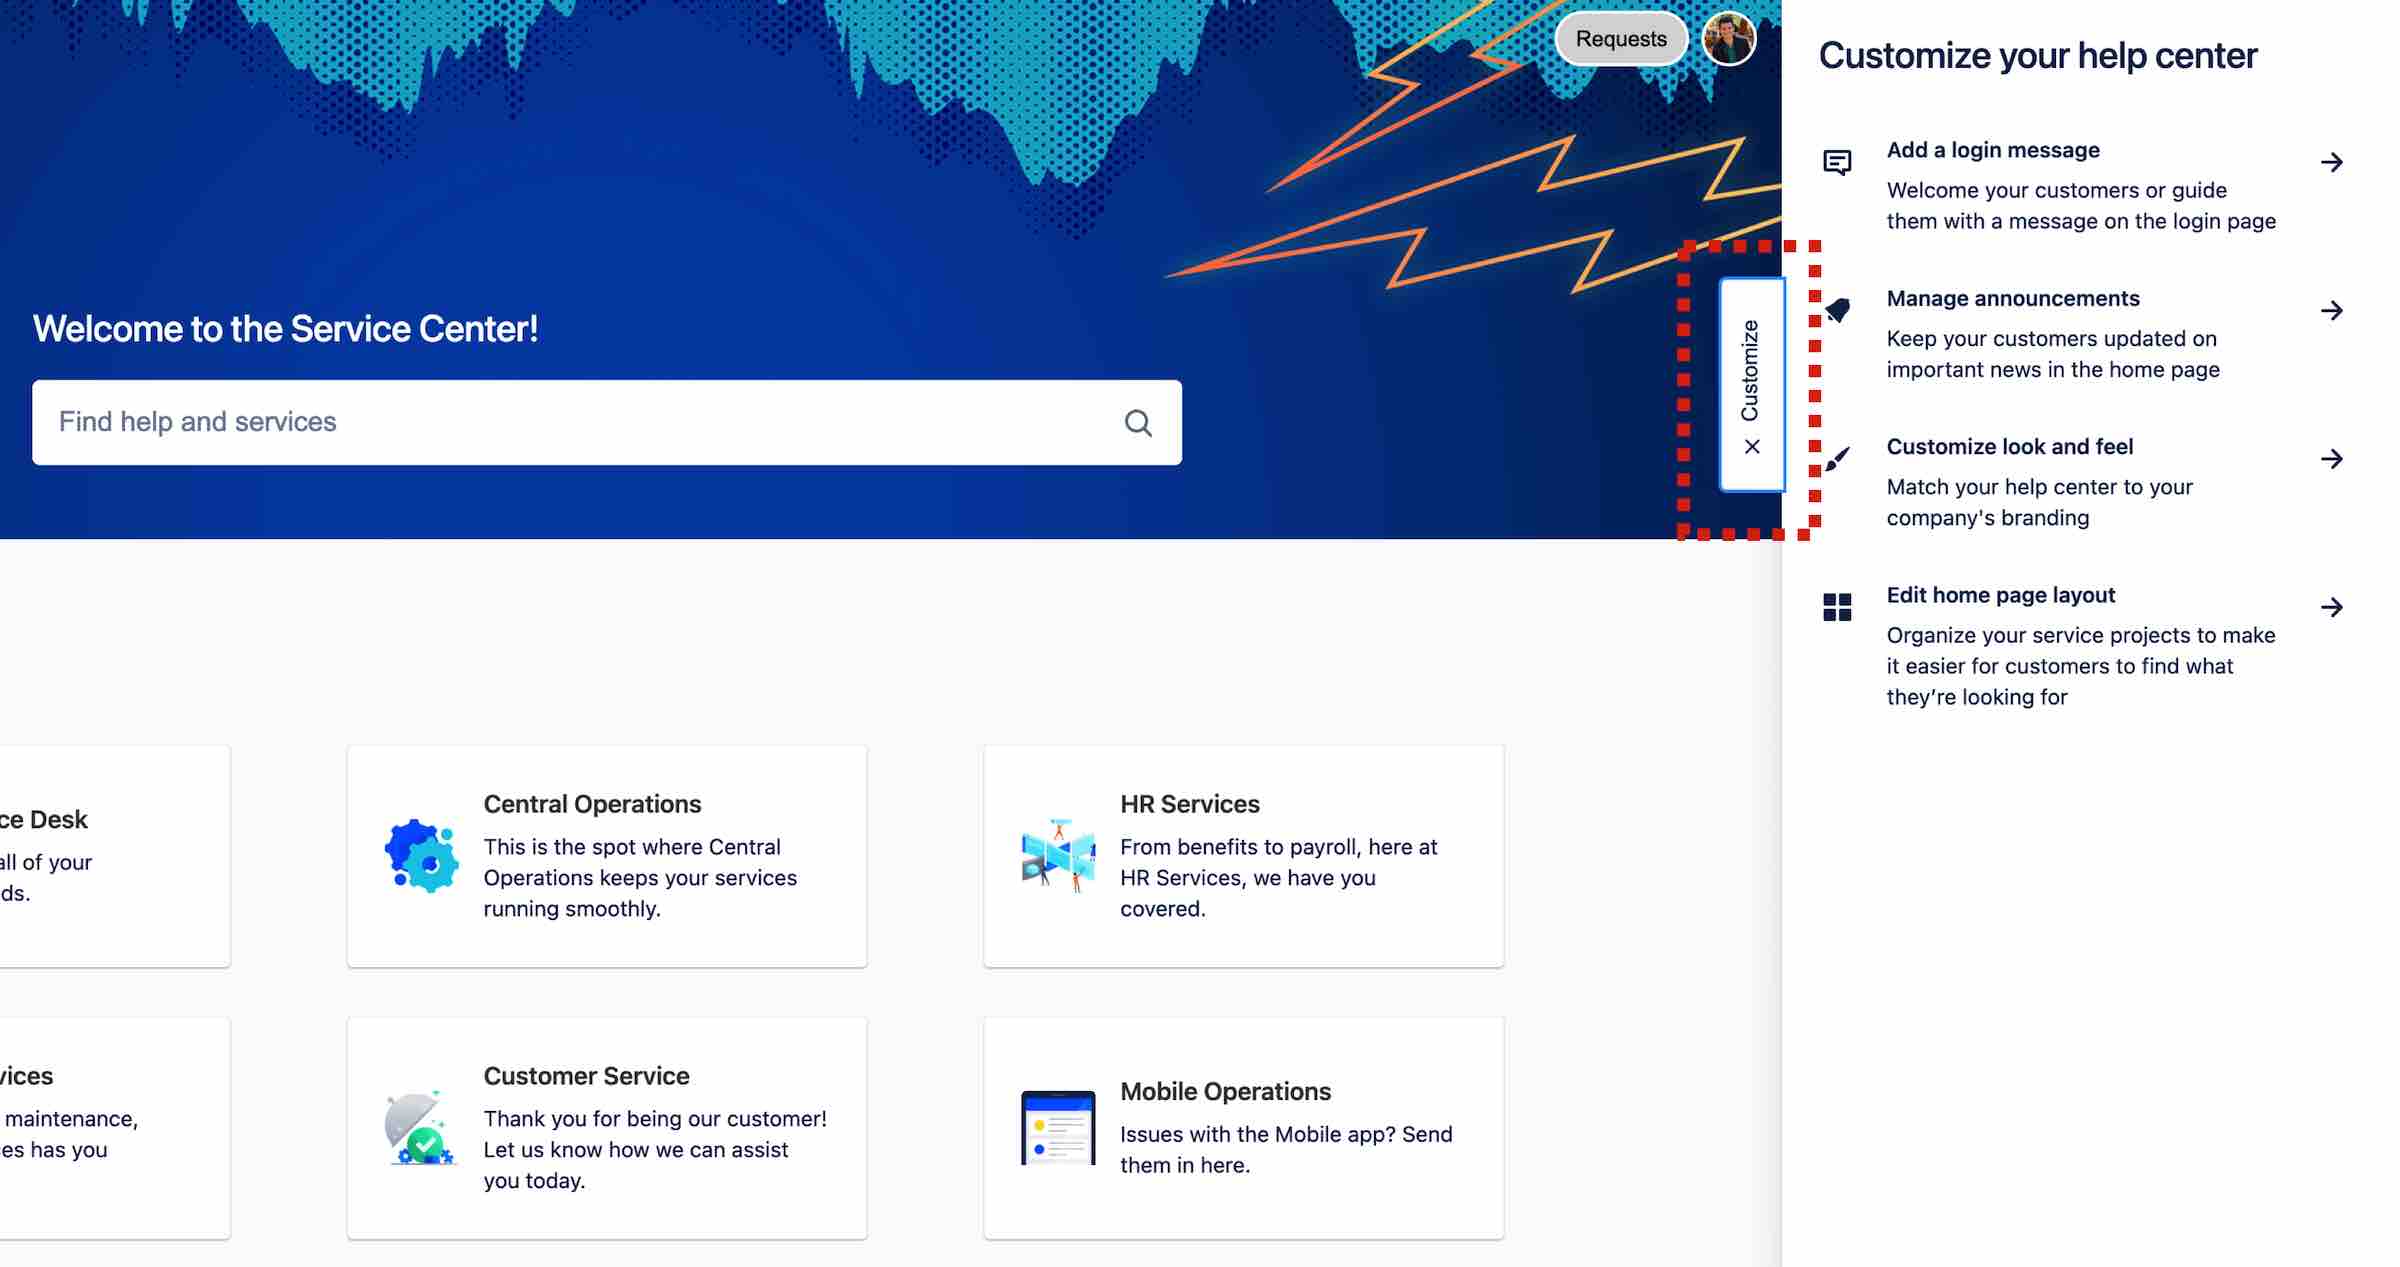
Customize your service project portal(s)
Every service project comes with an online portal that your customers use to interact with your service team. These portals live within the help center so that your customers can request help from any team within your organization in one centralized location. Similar to the help center, you change the name of your portal(s), welcome customers with an introduction, and add your company’s logo to reflect its brand.
To customize your project portal(s):
- From your service project sidebar menu, go to Project settings > Portal settings.
- Edit the Name, Introduction text, and Logo fields as needed. Your logo will appear in notifications sent by your service project.
Your portal’s header, URL, and button colors are inherited from the help center.
Configure your service project’s email address
Your service project comes with a pre-configured cloud email address that you can send to customers to start using right away. You can also add one custom email address to link to an existing account (for example, the email address your IT team uses for incoming requests).
To add a custom email account for incoming requests:
- From your service project sidebar menu, select Project settings > Email requests.
- Choose your email service provider in the connect a custom email account section and follow the prompts to link your account.
Step 2 - Set up your request types and customize your queues
Set up your request types
Jira Service Management provides a set of default request types based on the project template you used to create your service desk. You can also add your own to suit the needs of your customers and team. Request types can be organized into portal groups to help customers find the request type they need.
Below you can see an example of a service portal with request types prompting customers to get IT help, report a system problem, and report broken hardware.
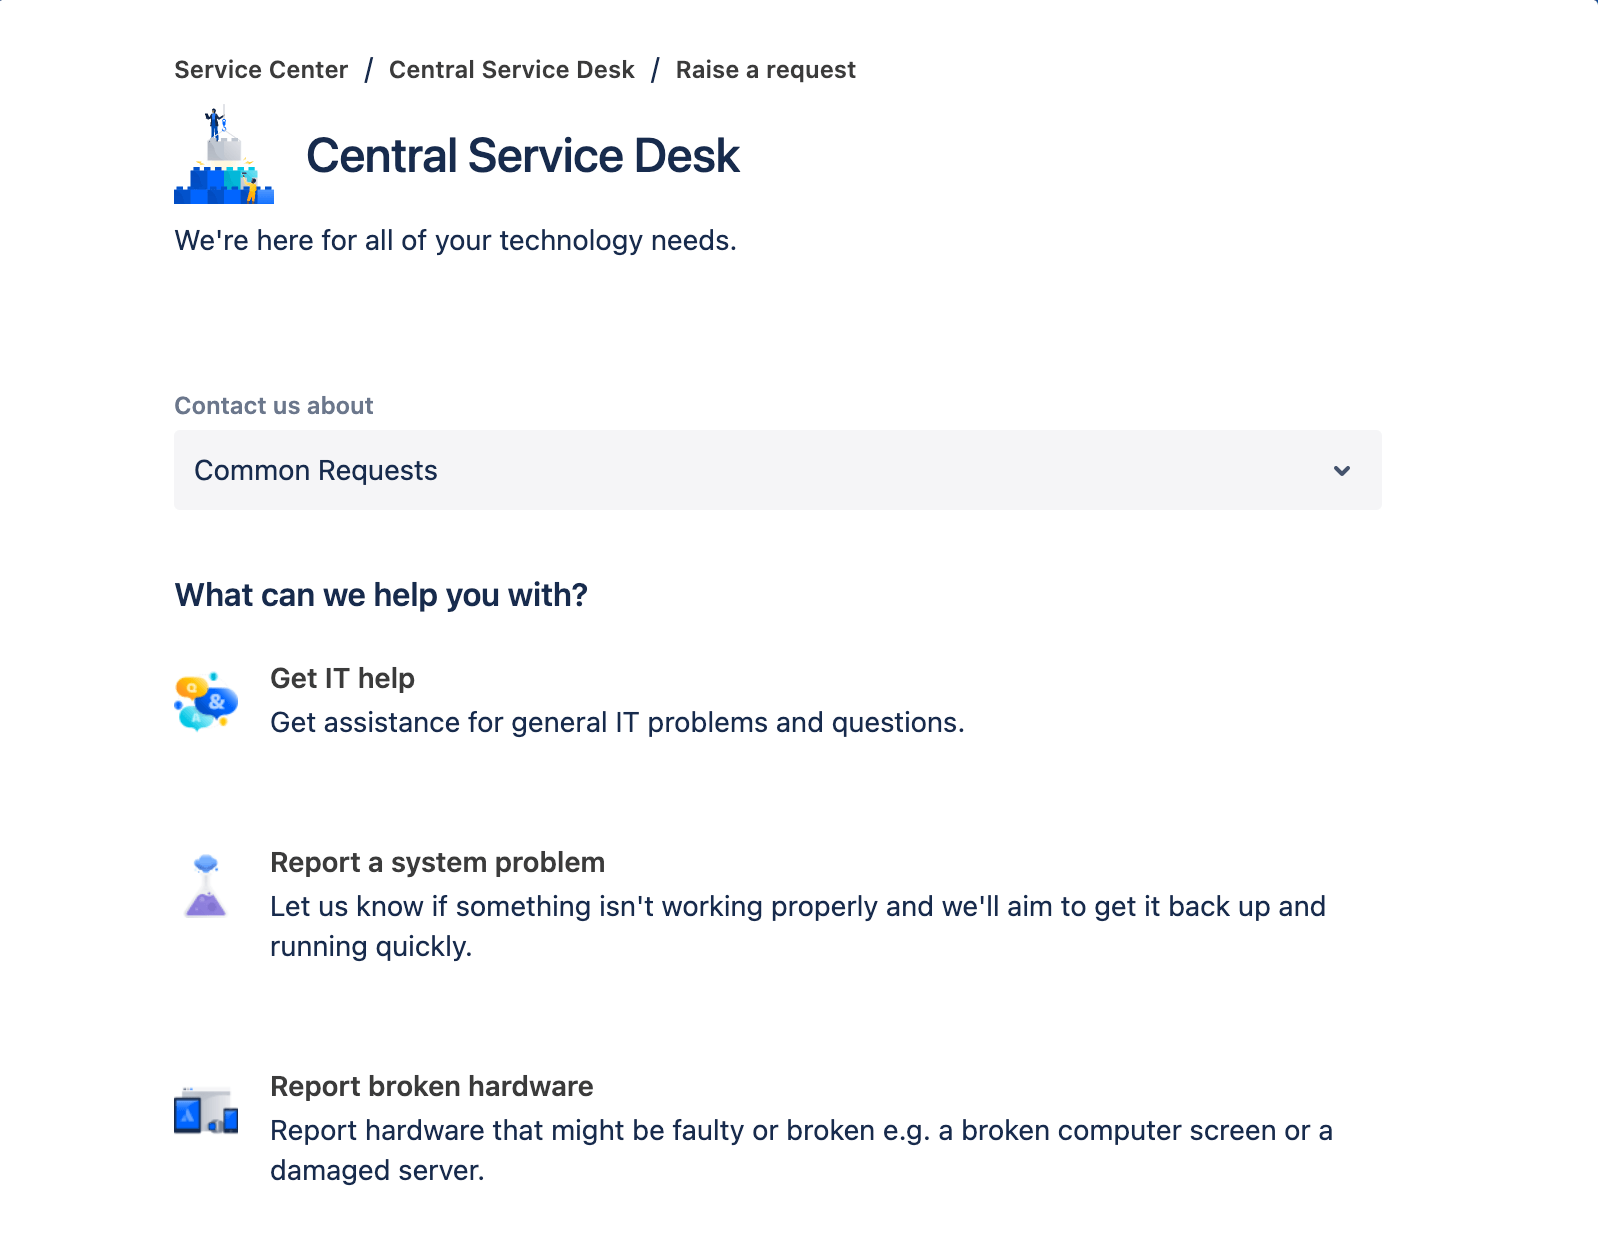
To create a new request type:
- From your service project sidebar menu, go to Project settings > Request types.
- Select Create request type.
- Enter the Request name, Icon, and Issue type.
- Choose a Portal group, create a new portal group, or leave the checkbox unselected to hide this request type from your portal.
- Select Create.
Once you have created a request type, you will need to determine what fields will be displayed to both your customers and your agents. You can customize each request type to show different fields and collect the exact information your team needs to succeed.
To edit a request type, including fields available in the agent and customer views:
- From your service project sidebar menu, go to Project settings > Request types.
- Select the request type you want to customize.
- In the Agent view tab, drag and drop fields to rearrange the order, select Add fields to add a new field, or drag and drop fields to Hidden to hide them. This will change what fields appear in the agent’s view of the issue.
- In the Request form tab, drag and drop the fields to rearrange the order or select Add fields to add a new field. You can also choose if fields are required to be filled in and you can add instructions for fields. This will change the fields that appear in the portal.
Note: In company-managed projects, each request type is associated with an issue type. These issue types can be shared across projects in your Jira site. Available request type fields and workflows are based on their associated issue type’s fields and workflows.
In team-managed projects, each project has its own request types that can’t be shared across projects. This means that each team-managed project has its own request types that are independent of other projects and are not associated with an issue type.
Customize your queues
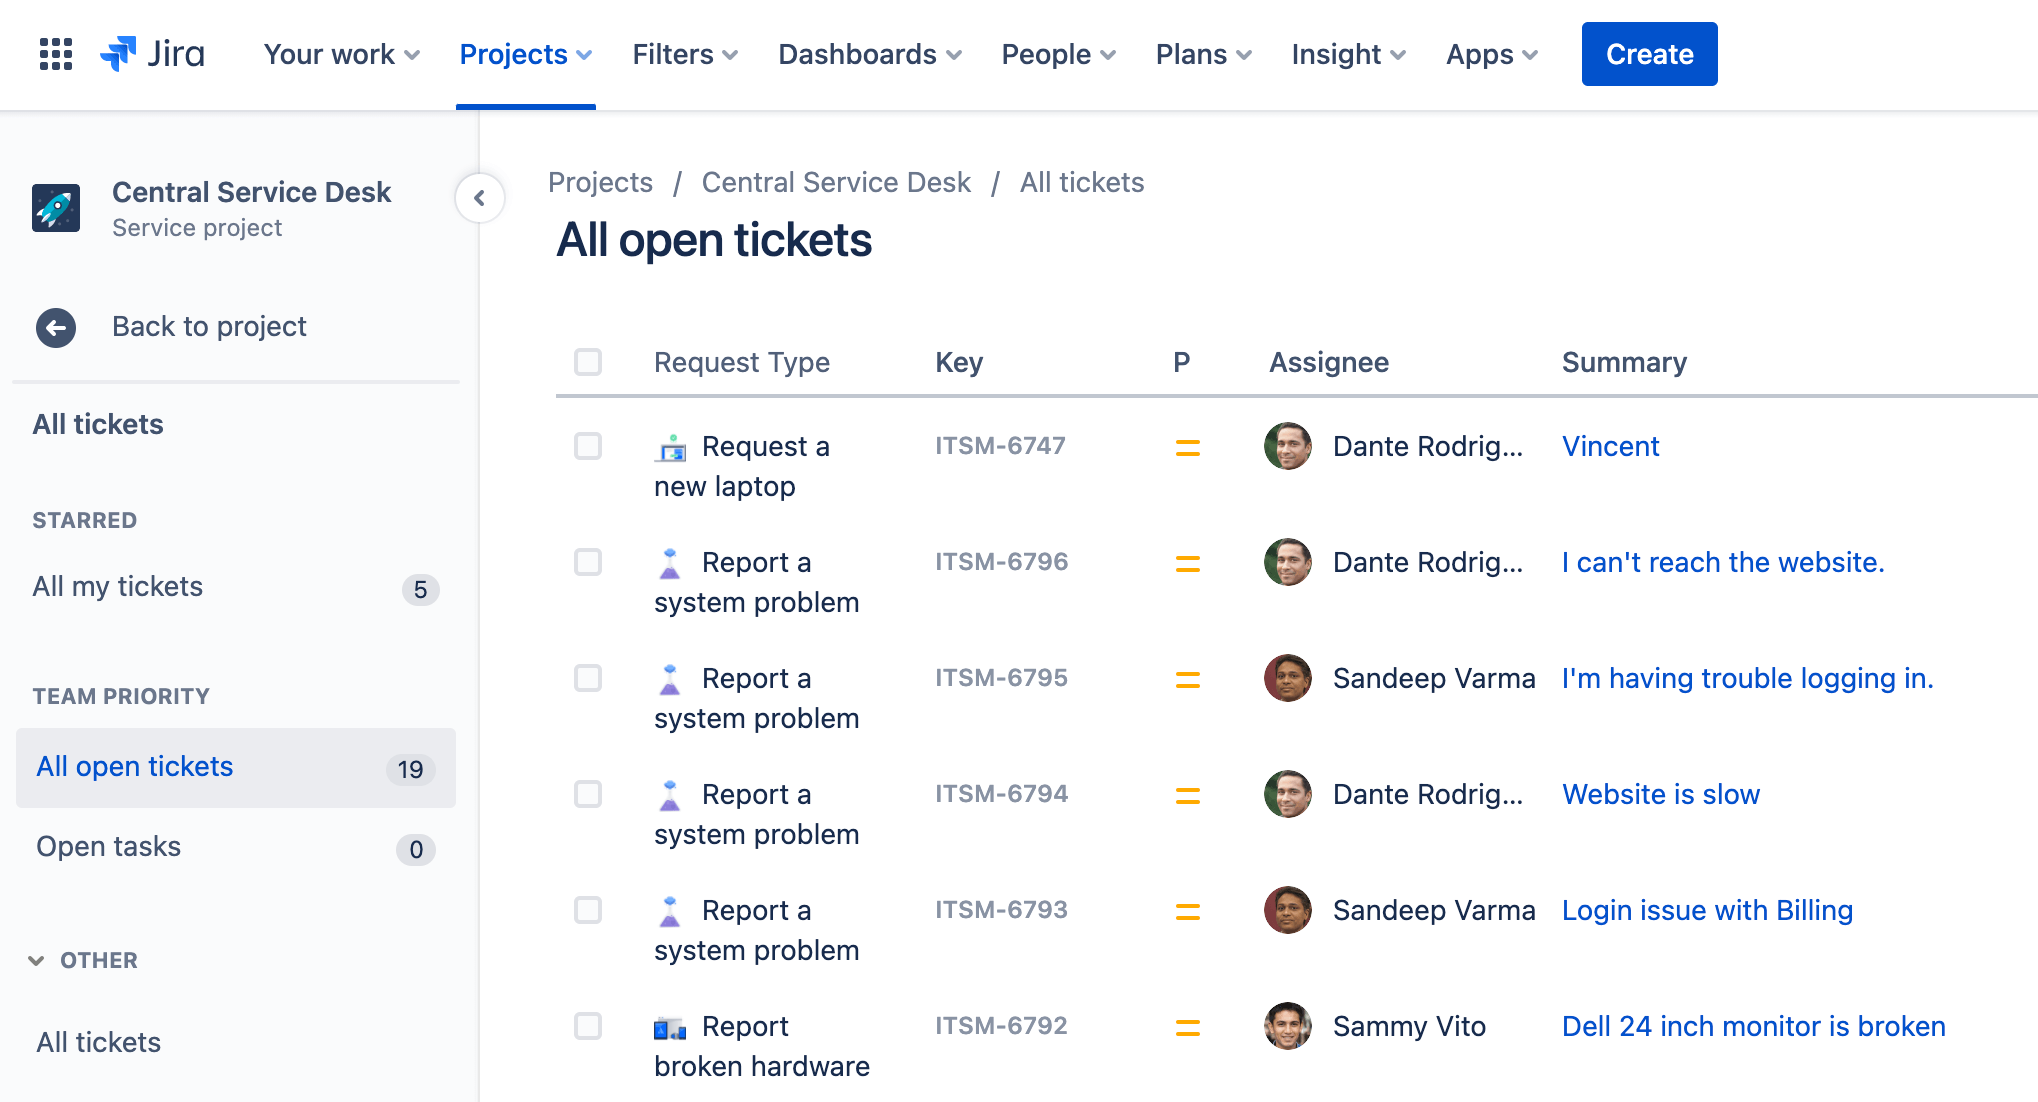
When your service project customers raise a request, that request becomes an issue in a queue. Queues help you automatically triage issues, organize the way issues appear to your team, and highlight the issues your team should work on first based on your SLAs. Your team will be able to see how many issues are in each queue and switch between queues to work on the right issue at the right time.
Jira Service Management comes with default queues that project admins can update to align with the way your teams triage and work on customer requests.
To access your queues:
- From your service project sidebar menu, go to Queues.
- Switch between queues in the sidebar menu by selecting them.
Organize your queues:
Queues can also be organized into three sections to keep your workspace tidy:
- Starred - Starring a queue helps you handpick your favorite queues and access them quickly from your service project. Starred queues appear only in your view and won’t impact your team’s work.
- Team priority - Business-critical queues for agents to see at all times.
- Other - Queues are collapsed in this group but agents can Star to pin them in place.
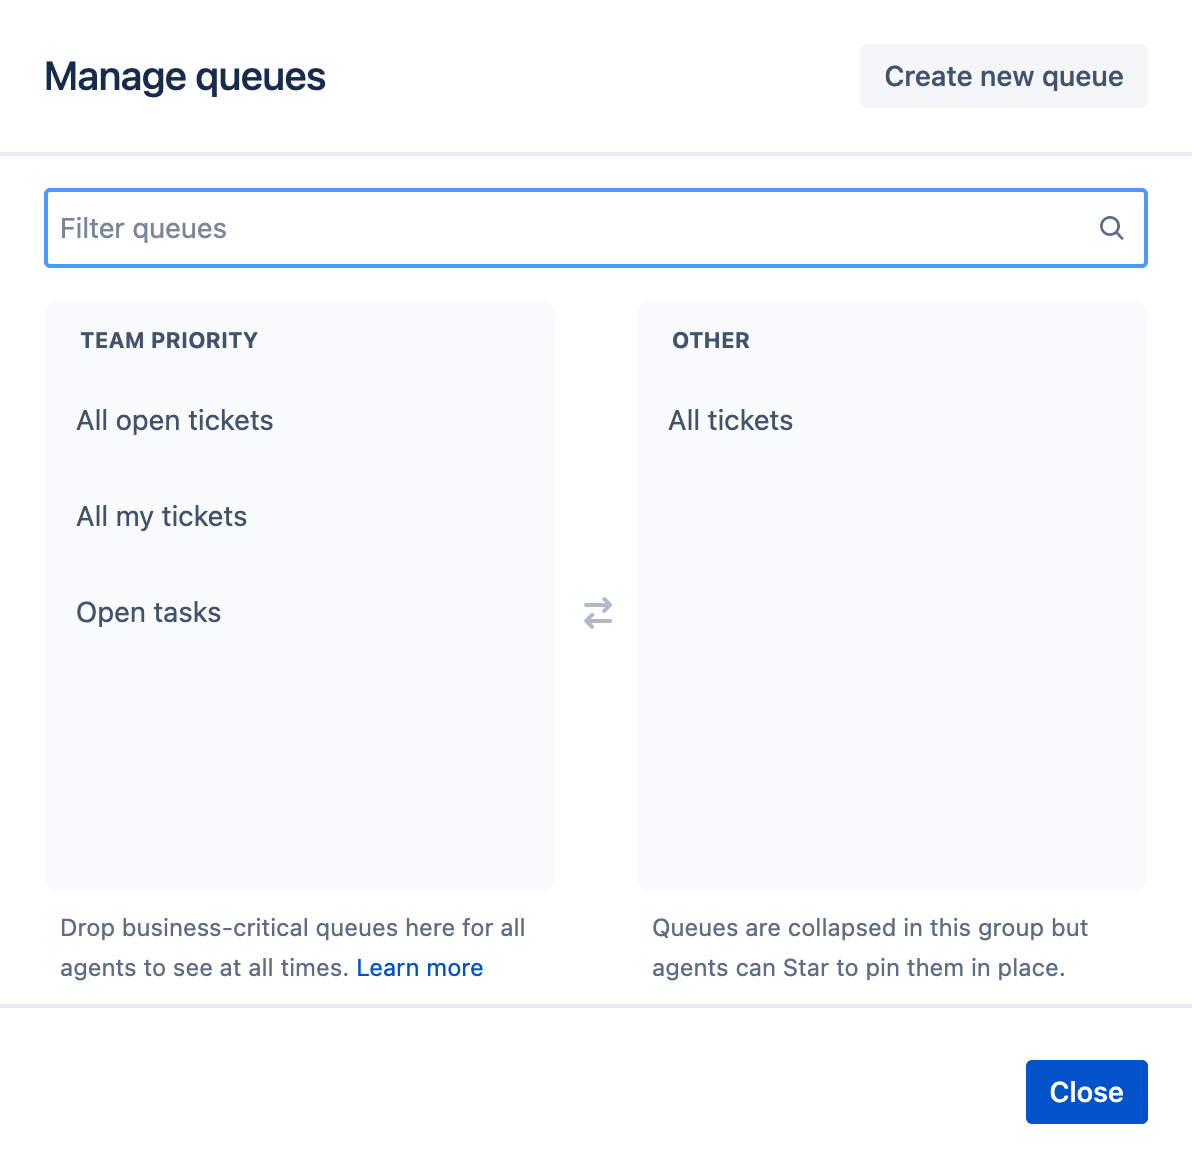
To arrange queues:
- From your service project sidebar menu, go to Queues.
- Select Manage queues.
- Drag and drop the queues between the two groups: Team priority and Other.
- Select Close.
To star a queue, simply hover over the queue of your choice and select the star icon
Create a new queue
As we mentioned earlier, Jira Service Management comes with a set of out-of-the-box queues that your team can use and you are able to edit the default queues to display issues based on your preferences.
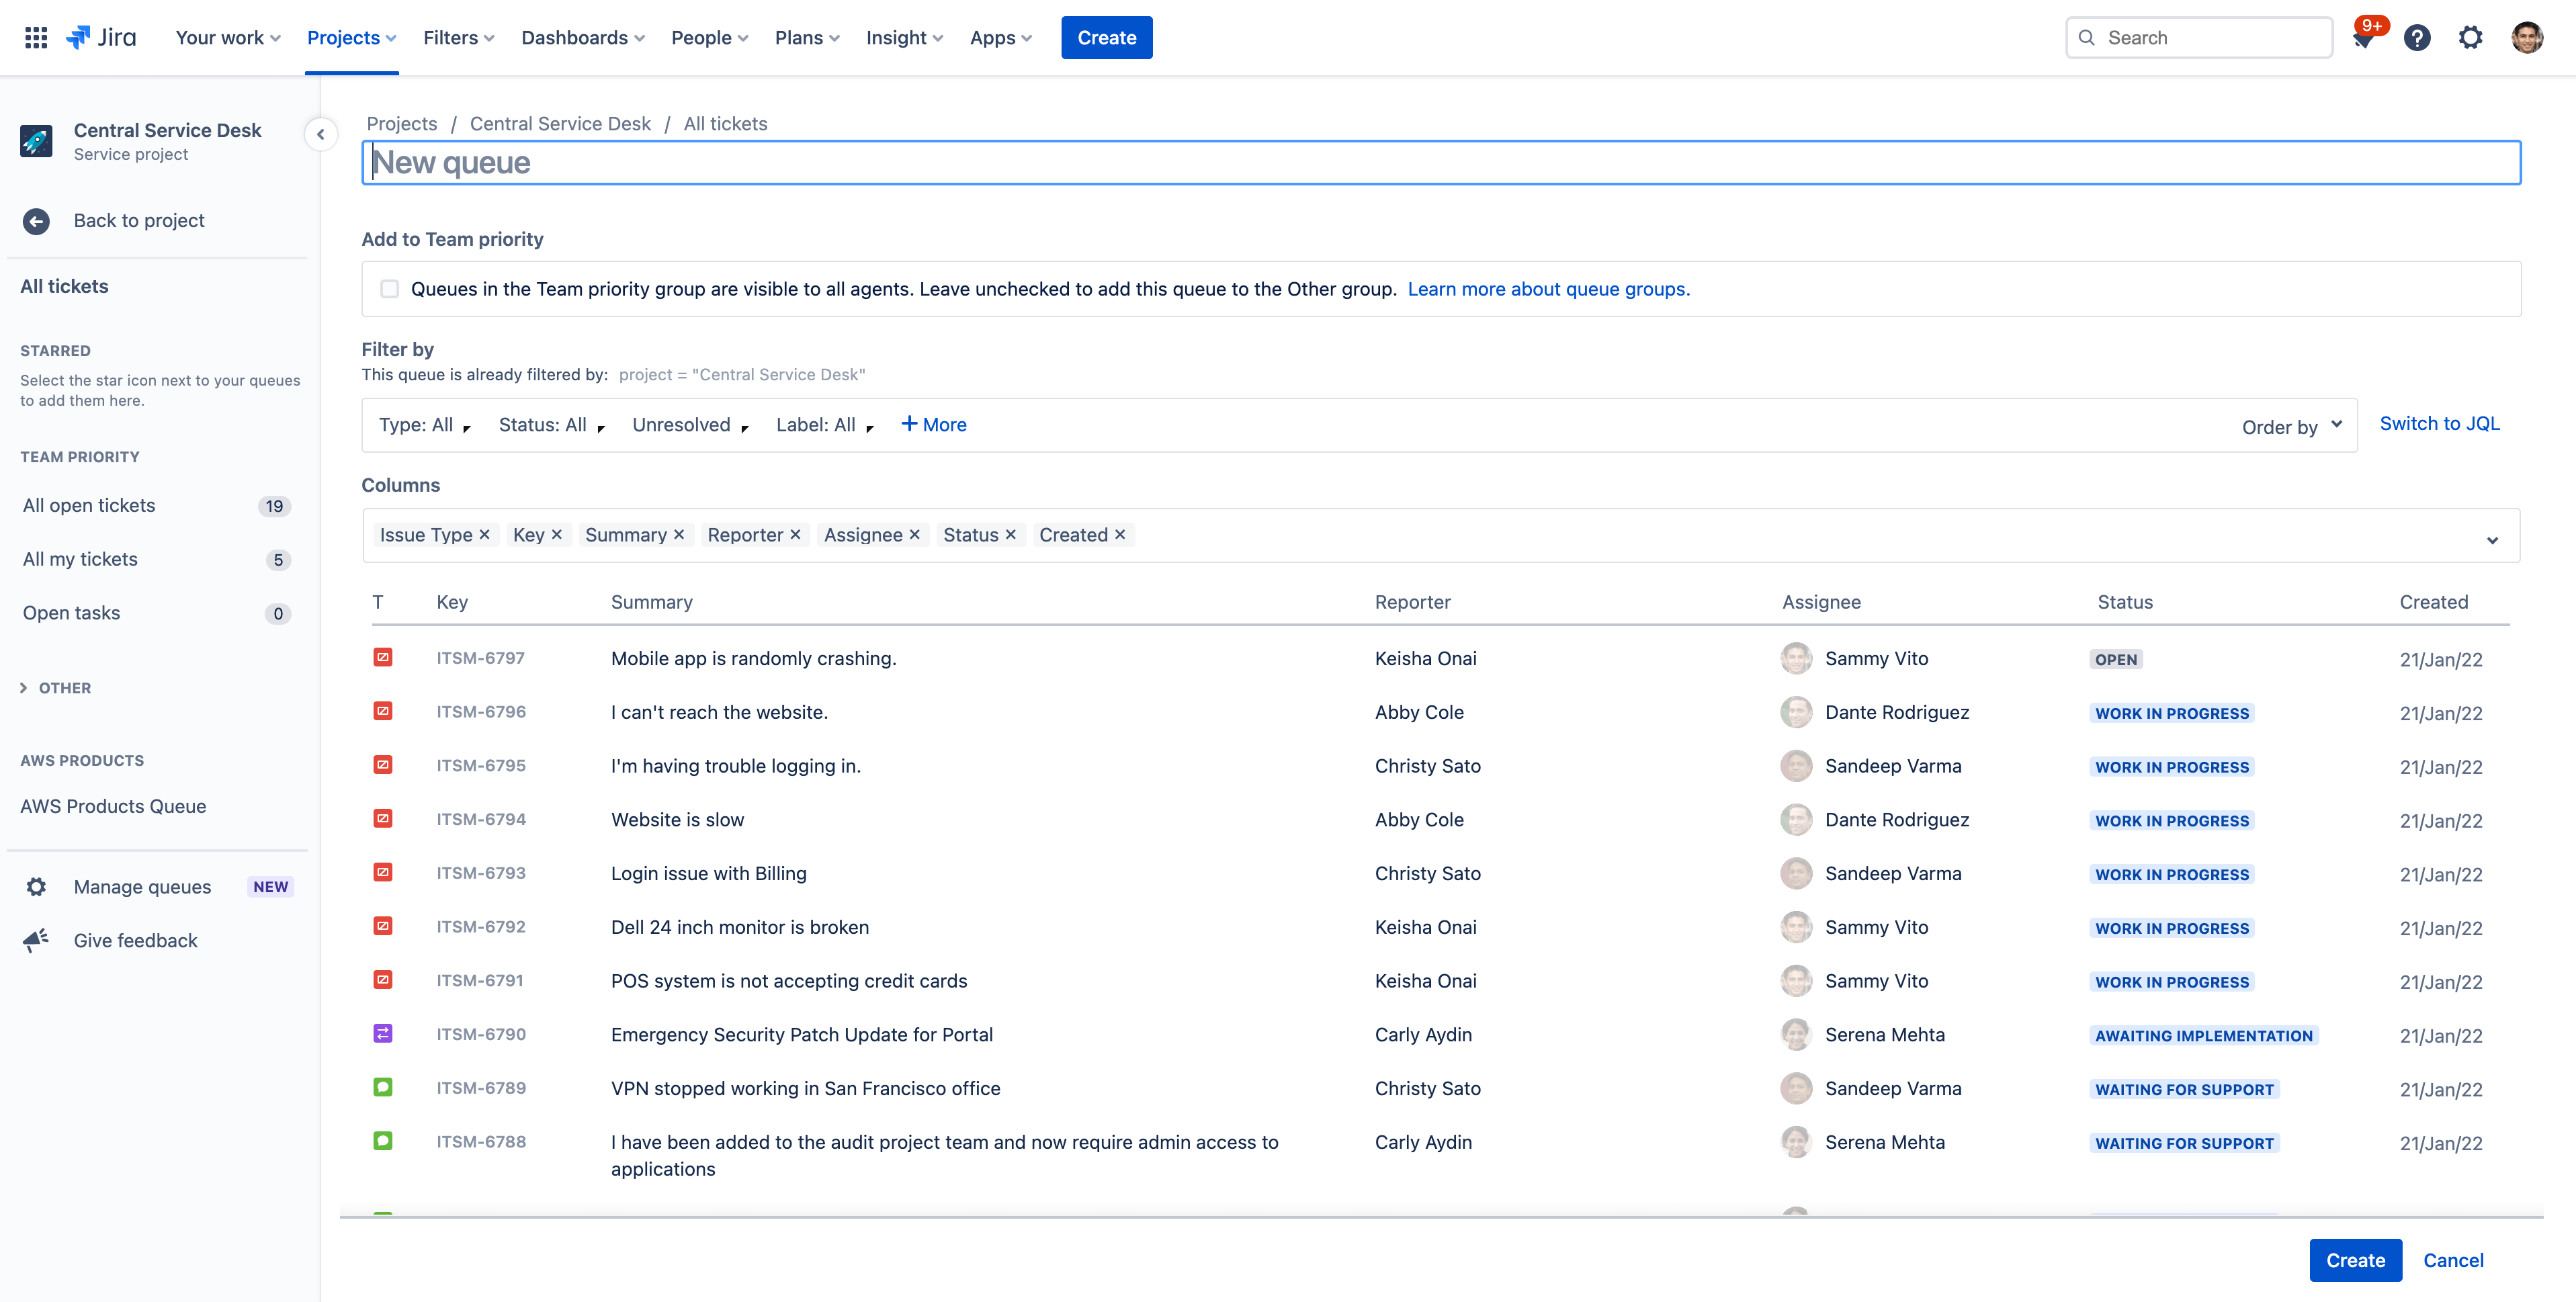
Jira Service Management also allows you to create your own queues to suit your needs. These can be set to show specific requests based on their type, status, or something more specific using a Jira query language statement.
To create a new queue:
- From your service project sidebar menu, go to Queues.
- Select Manage queues from the navigation sidebar.
- Select Create new queue.
- Enter a name for your queue.
- In the Filter by section, select the issue type, status, resolution, and label from the drop-down menus. You can also select Advanced to enter a JQL statement.
- If required, select criteria from the More drop-down menu.
- If required, select an order from the Order by drop-down menu.
- From the Columns section, update columns by dragging and dropping to the required location. This is the order of the columns that appear in your queue.
- Select Create.
Step 3 - Add your team members and customers to your service project
Add team members to your project
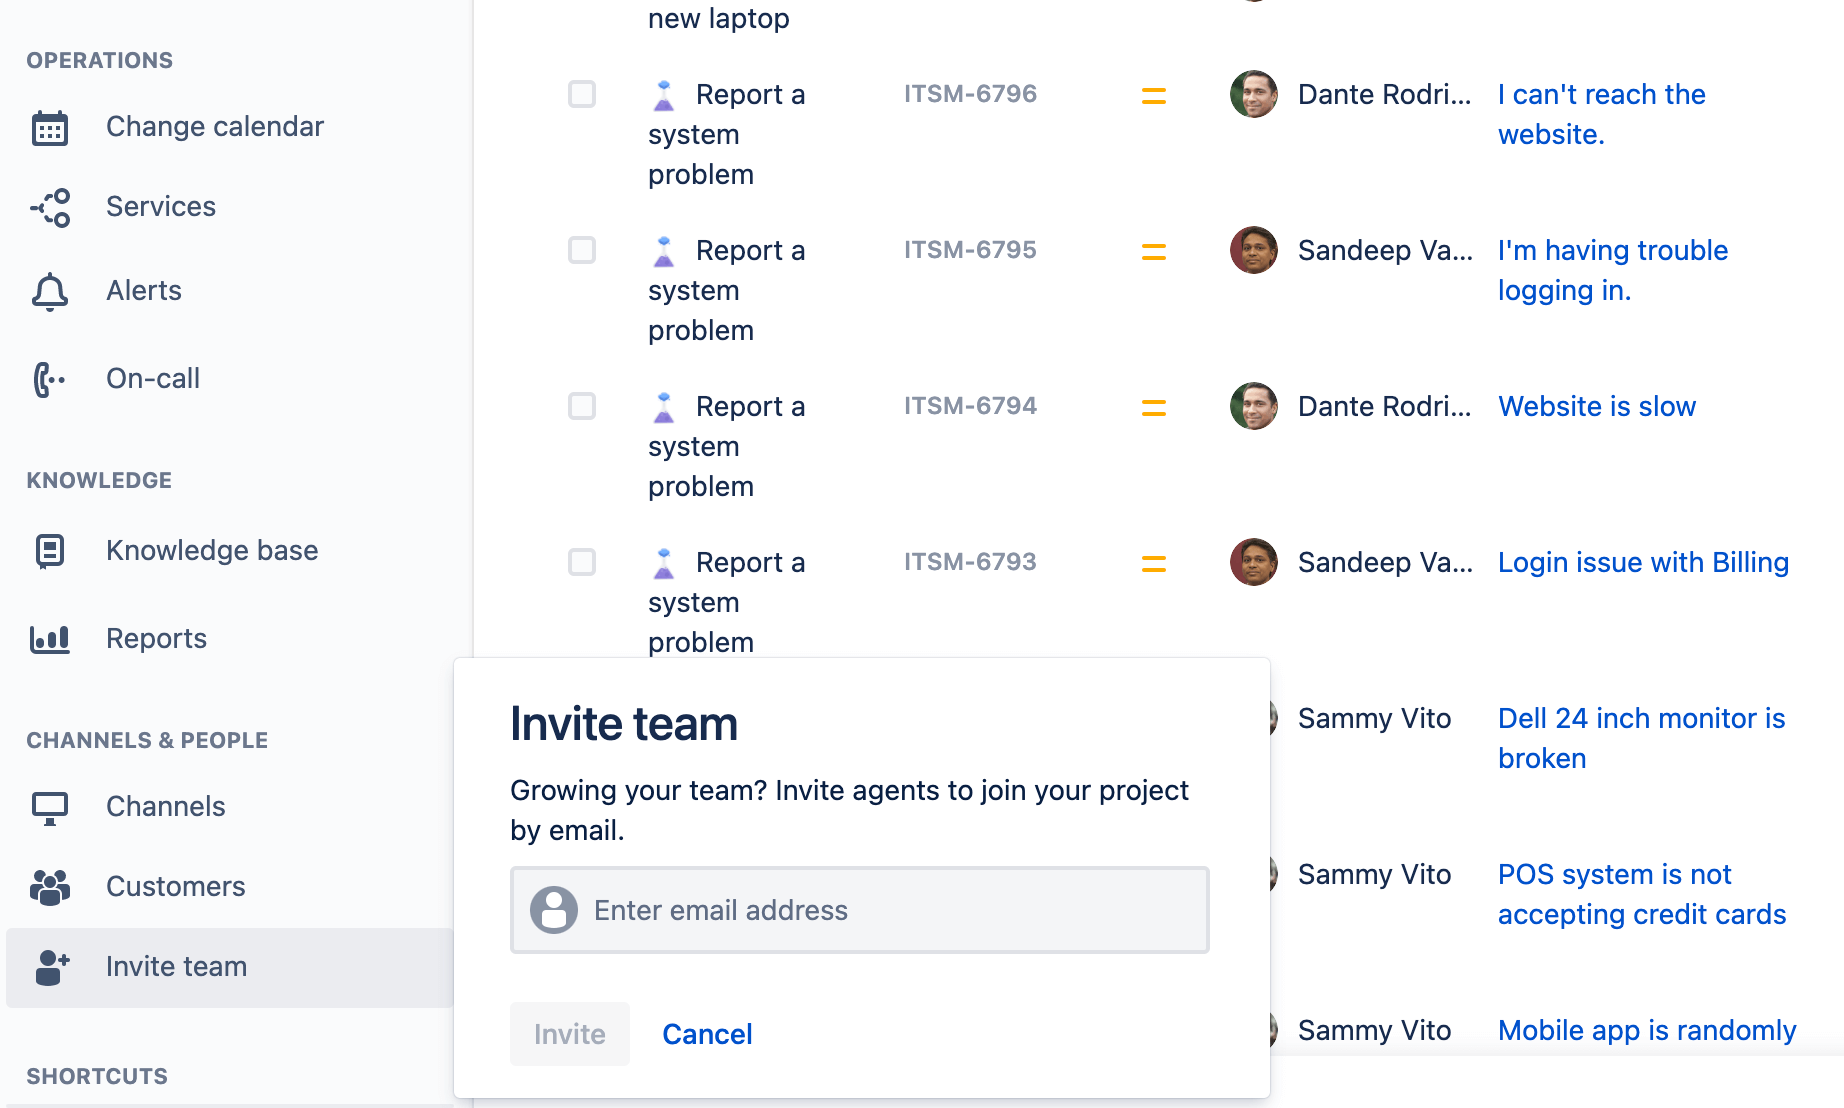
It’s time to get the party started! Once you have your new project set up, start inviting team members. To get your team involved, start by adding each team member as an agent to your service project.
To add team members:
- From your service project sidebar menu, go to Invite team.
- Enter the email(s) of the users you would like to add as an agent.
- Select Invite.
- Your agent is added to the Service Project Team role and receives an email with a link to the service project.
Add customers to your project
Next, let’s add customers to your newly created service desk. You don’t need to add customers to your service project right away, but it’s important to learn how to add them.
Both administrators and service project agents can add customers to a service project.
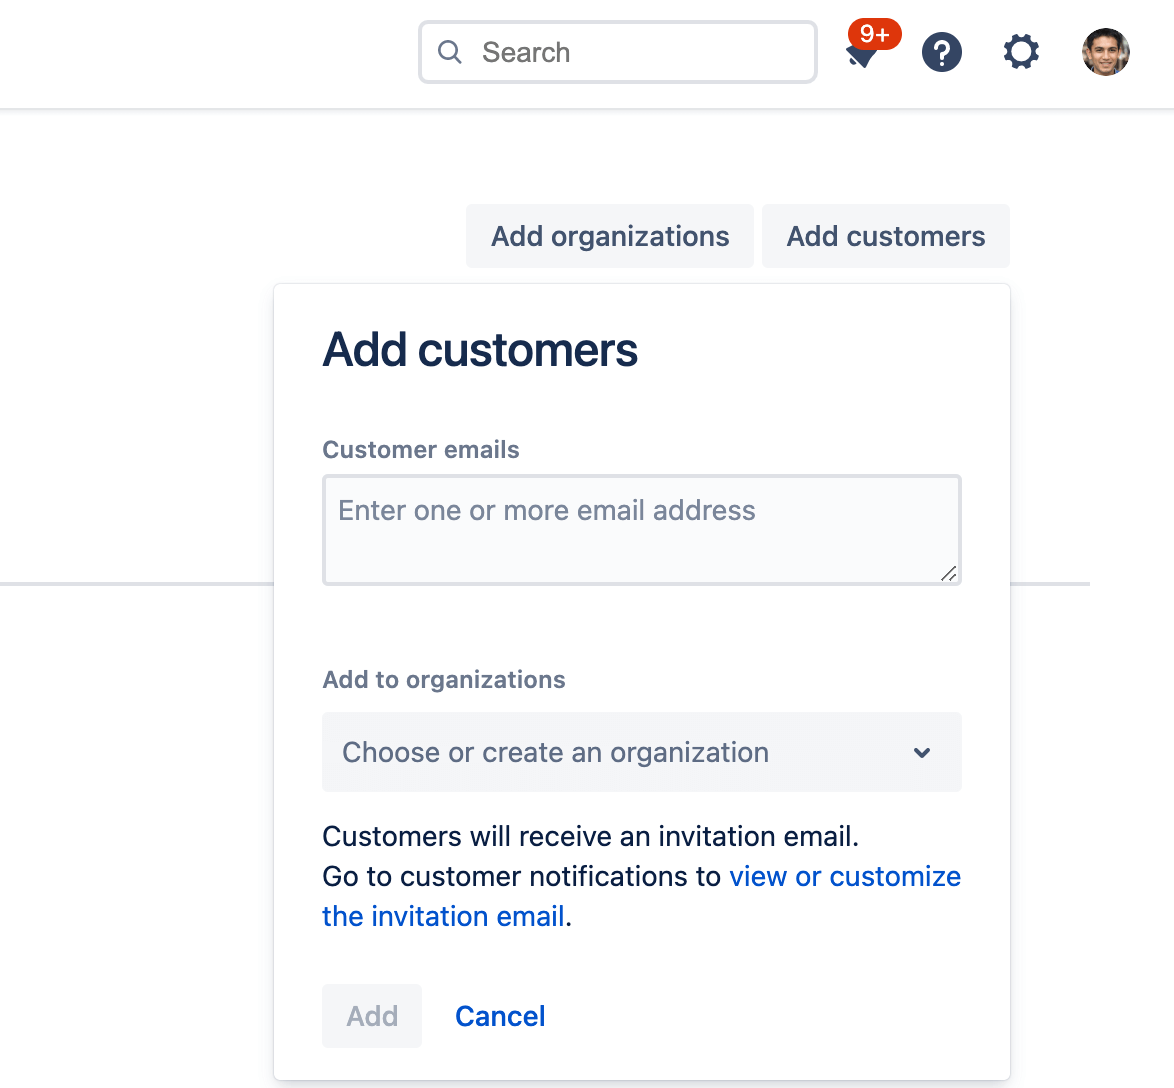
To add customers:
- From your service project sidebar menu, go to Customers.
- Select Add customers.
- Enter the customer’s email. Separate customers by commas to add more than one at a time.
- Add the customer to an organization (optional).
- Select Add.
- Customers will receive an invitation email. Go to customer notifications to view or customize the invitation email.
You can also set up Jira Service Management to allow customers to add themselves. Or, you can open your service project to Jira users. Learn more about customer permissions.
Now that you’re done with the basics, take your project to the next level with our collection of helpful how-to guides, explainers, and documentation. There’s plenty more to learn…
- Check out our Jira Service Management on-demand demo where you can choose specific features that you are interested in for a personalized demo.
- Check out the other Jira Service Management product guides, covering everything from basics to in-depth practices.
- Download Jira Service Management for Mobile so you can deliver great service on the go.
About Jira Service Management
Overview
Getting Started
Service Request Management
